


How to Install Wall Mounted Shelves: A Step-by-Step Guide
Wall-mounted shelves are a fantastic way to maximize space while showcasing your favorite books, decor, and plants. Installing them correctly ensures both safety and visual appeal, especially in homes with limited space. Whether you’re looking to install floating shelves or any other type of wall shelf, this step-by-step guide will walk you through the process.
Quick Tip:
For most homes, 18–22 cm depth works best for books and décor. Too shallow, and things fall off; too deep, and they look bulky.
Tools You’ll Need
Before you start, gather the following tools and materials:
- Measuring tape
- Level
- Drill (with appropriate drill bits for your wall type)
- Screws and wall plugs (anchors)
- Pencil for marking
- Screwdriver
- Stud finder (if working with plasterboard or drywall)
- Safety goggles (for protection during drilling)
Step 1: Choose the Right Shelf for Your Wall
Not all shelves are created equal, so it’s important to select a shelf that suits your needs:
- Shelf depth: Make sure it’s deep enough to hold your items securely. For heavier items, a deeper shelf (e.g., 25–30 cm) will provide better stability.
- Wall material: Check your wall type. Brick and concrete walls can hold heavy items, while plasterboard or drywall needs appropriate anchors for safe installation.
- Weight capacity: Consider the weight of the items you’ll be placing on the shelf. Heavier items require stronger anchors and possibly additional support brackets.
For various shelf options, you can explore the curated wall-mounted shelves collection from MH London.
Step 2: Choose the Right Location
To avoid issues down the line, you need to choose the perfect spot for your wall shelf:
- Measure and mark where you want to place the shelf, ensuring it’s level.
- Consider spacing: Leave enough room between shelves if installing multiple to allow for proper item display and easy access.
- Avoid studs: If you want to hang heavy items, ensure you are drilling into the wall studs (wooden support beams behind drywall) for better weight distribution. Use a stud finder to help with this.
Pro Tip: If you plan to install multiple shelves, start by measuring the distance between them to maintain even spacing.
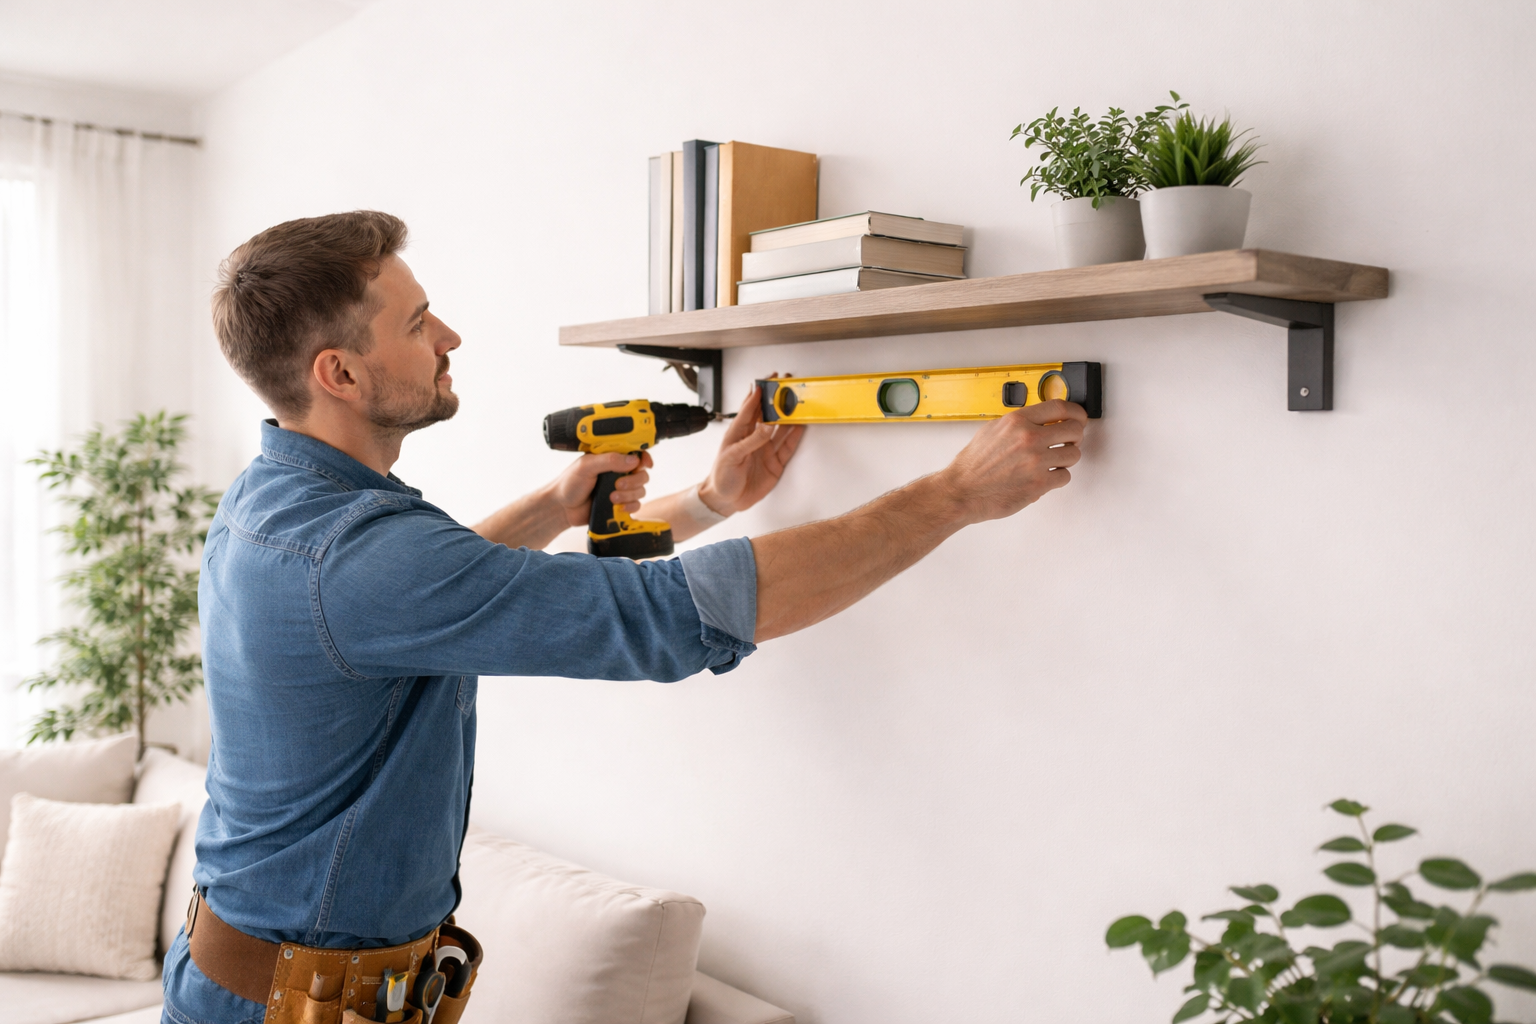
Step 3: Mark the Holes and Drill Pilot Holes
Once you’ve determined the placement, mark the spots where the brackets will be installed:
- Use a pencil to make small marks where the screws will go. Double-check your measurements and ensure the marks are level.
- For floating shelves, make sure your marks line up with the shelf brackets.
- Drill pilot holes at the marked spots using a drill. For plasterboard, use a smaller drill bit than the screw size to prevent cracking. For brick or concrete, use the appropriate drill bits for masonry.
Step 4: Install Wall Anchors (For Drywall or Plasterboard)
If you’re installing on drywall or plasterboard, you’ll need wall anchors to ensure the shelf stays in place:
- Insert the wall plugs/anchors into the drilled holes.
- For heavy items, use metal anchors for a stronger hold.
- For lighter items, plastic anchors might be sufficient.
Make sure the anchors are flush with the wall to ensure they hold the screws securely.
Step 5: Attach the Shelf Brackets
- Once the anchors are in place, it’s time to screw in the brackets.
- Align the brackets with the marks and screws, ensuring they are level.
- Tighten the screws securely but avoid overtightening, as this can cause the wall to crack or the bracket to become unstable.
Step 6: Install the Shelf and Adjust
Once the brackets are secured to the wall:
- Place the shelf on the brackets (for floating shelves, carefully slide the shelf onto the hidden brackets).
- Adjust the shelf if necessary to ensure it’s level.
- For shelves with multiple brackets, ensure they align evenly for a clean and balanced appearance.
Step 7: Check for Stability
Now that the shelf is installed, you should test its stability:
- Gently place a few items on the shelf, ensuring it doesn’t wobble or shift.
- If the shelf feels loose or shaky, check the screws and anchors, and tighten them if needed.
Step 8: Add Your Items and Style the Shelf
Once you’ve confirmed the shelf is secure, it’s time to add your items:
- Books: Stack books neatly, mixing sizes and colors for a modern look.
- Decor: Add plants, photo frames, and unique decorative pieces.
- Practical items: Keep smaller items like keys or remotes organized in trays or decorative baskets.
Pro Tip: For better visual balance, don’t overcrowd the shelf. Leave some open space for a minimalist look.
Explore Our Wall-Mounted Shelves Collection
If you’ve just learned the best depth for your shelves, now it’s time to find the perfect wall-mounted shelves to suit your style and storage needs. Explore a wide range of options in MH London’s curated collection of wall-mounted shelves, designed to meet every home’s needs — whether you need extra storage or a space to showcase your favorite decor. Explore Our Wall-Mounted Shelves Collection
FAQs
How much weight can wall-mounted shelves hold?
It depends on the shelf material, anchors, and wall type. On average, a well-installed shelf with appropriate anchors can hold up to 20-30 kg. For heavier items, use more brackets and stronger anchors.
Can I install wall-mounted shelves on plasterboard walls?
Yes, but you need the right wall anchors. Metal anchors work best for plasterboard and allow you to support heavier loads.
How do I make sure my shelf is level?
Use a spirit level during installation to ensure the shelf is perfectly level. Double-check your measurements before drilling.
H3: Can I install floating shelves without brackets?
No, floating shelves rely on hidden brackets to provide stability. The brackets are installed into the wall, and the shelf rests securely on them.
Conclusion
Installing wall-mounted shelves can be a simple DIY project with the right tools and steps. Whether you’re looking to add storage or just want to display your favorite décor, this guide will help you install shelves safely and securely. If you’re still unsure about installation, consider consulting a professional to ensure the job is done right.